Page 1
Decorated Paska
Standard

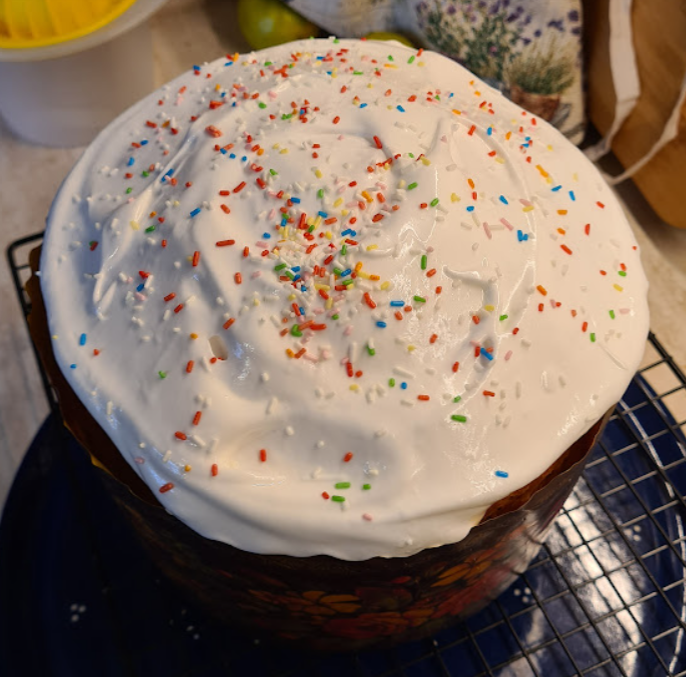
Ukrainian Easter Paska

Easter is one of the most important Christian holidays, celebrated across the world in a variety of ways. In Ukraine, the Easter holiday is steeped in tradition and culture, and is typically marked by a delicious and unique food item – Paska.

Paska is a type of sweet bread that is traditionally baked and eaten during Easter celebrations. This bread is characterized by its cylindrical shape and often decorated with intricate designs and symbols that are meant to represent the holiday’s significance. While Paska is typically consumed during Easter Sunday dinner, it can also be eaten throughout the week leading up to the holiday, which is fortunate, as it’s only Saturday.

In Ukraine, the tradition of baking and eating Paska goes back many centuries and is an integral part of the country’s rich cultural heritage. Ukrainian families take great pride in their Paska recipes, which are often passed down through generations. In addition to its delicious taste, Paska also has symbolic significance in Ukrainian culture, representing renewal, rebirth and hope. Many families decorate their Paska with ornate designs and patterns.

As my fiancé is Ukranian, this Easter I made some. We went to a Russian supermarket to pick up the ingredients and a paper case to cook it in.

Ingredients

For 1 Large Paska. I was hoping for more, but nope.

  • 125 g softened butter
  • 275ml milk
  • 2 packets dried yeast (2 x 7g)
  • 1.5tbsp sugar (to feed the yeast)
  • 2 eggs (save the whites for the glaze)
  • 275g of sugar
  • 15g vanilla sugar
  • pinch salt
  • 2 tbsp. sour cream
  • 1 orange
  • 25ml brandy
  • 1kg flour (all purpose, or I used type 550 – found in Germany)
  • sunflower oil for greasing
  • 125g candied orange peel (Orangeat in Germany)
  • Sprinkles for decoration (and anything else)

For the glaze

  • 150g white sugar
  • 40ml water / juice from orange
  • 2 egg whites (left over from the paska)

Instructions

Take the butter out of the fridge to come to room temperature.

Microwave 275ml milk for around 1 and a half minutes in a bowl that’s big enough for twice the quantity. It should be warm (around 20C) but not hot. Mix in 2 packets of dried yeast and 1.5tbsp sugar into the warm milk. I rubbed it together with my fingers. Cover the bowl with cling film and leave it in a warm place for 20 minutes. It should double in size.

A bowl with milk/yeast/sugar bubbling.

Add 2 egg yolks (save the whites), 275g of sugar, 15g vanilla sugar, pinch salt, 125 g softened butter, 2 tbsp. sour cream, the zest from the orange, half it’s juice (save the other half for the glaze) and 25ml brandy. Whisk it to combine. I found the butter a bit annoying to whisk – I’ll try melting it first next time.

Add 1kg flour and stir until smooth, then knead the dough for about 10 minutes.

Put the dough in a large deep bowl, greased with sunflower oil. Cover it with a towel and leave it in a warm place for 1 hour to rise. The dough should double in size.

Paska dough

Once risen, knead the dough and leave to rise again for 40 minutes.

Preheat oven to 180C (after the 40 minutes)

Add 125g candied orange peel to the dough and knead it a third and final time. Fill a paper or metal mould(s) around 2/3 full. If you are using a metal mould, line the bottom with baking paper and grease the sides with butter. Leave in a warm place, covered with a damp towel until the dough rises to the top of the mould. For me, this took a long while – I don’t know if my yeast is too old, I might try using more yeast next time.

Paska dough with peel

Bake the Paska for 35 minutes. I used conventional heating (no fan). Once done, a skewer should come out clean.

Paska in a case

Leave to cool completely

Paska baked

Once the paska is cooled, it can be “glazed”. Pour 150g white sugar into a saucepan, add 40ml water and heat on medium/high. Boil for 5-7 minutes.

Whilst the syrup is cooking, whisk the egg whites to peaks.

Gradually pour in the boiling syrup, without ceasing to beat the whites, beat with a mixer for another 5-6 minutes. Use the glaze immediately or it will harden.

Decorated Paska
Standard

Roast Pumpkin Red Curry

It’s autumn and there are pumpkins everywhere. I love Thai red curry, so this is something similar to that. You don’t have to add MSG, but you’re missing out if you don’t (you can get it in Asian supermarkets).

Ingredients

Serves 8

  • 4 small Hokkaido pumpkins (~1.5kg), peeled and cubed 1.5cm
  • 2tbsp vegetable oil
  • Red curry paste (below)
  • 4 400g tins coconut milk
  • 400g mushrooms, halved or quartered if they are too big
  • 500g potatoes, peeled and cubed 1.5cm
  • 6 shallots, quartered
  • 4 Tbsp fish sauce (to taste)
  • Juice of 2-3 limes (zest for paste)
  • 3-4 Tbsp raw sugar
  • 30 leaves Thai basil (or substitute basil)
  • 3 red peppers, julienned
  • 4 kaffir lime leaves (if you can find them)
  • 8 cardamom pods
  • 8 star anise
  • 1tsp MSG

Red Curry Paste (this can be made in advance)

  • 1 tsp white peppercorns
  • 2 tsp coarse sea salt
  • 16 small red chilies, seeded (not too spicy), sliced
  • 4 lemongrass shoots finely diced
  • Zest of two limes
  • 8 cloves garlic chopped
  • 100g ginger, finely diced
  • 10 coriander stems, sliced
  • 8 shallots, finely sliced

Instructions

Heat oven to 200C.

Halve the pumpkins, scoop out and discard the seeds.  Peel and dice into roughly 1.5cm cubes.  Cover with oil, spread out on oiled foil on a baking tray and roast until starting to char (around 40 minutes).  Move them around occasionally to try to stop them sticking and get even an even roast.

Make the red curry paste by grinding everything together in a pestle & mortar (or food processor if that feels like too much). Add one or two ingredients at a time, in the order above. If your mortar gets full, empty it into a bowl and carry on with the other ingredients.

Add 2tbsp vegetable oil to a large pan (that’ll hold all the ingredients), add the curry paste and fry for 5 to 10 minutes.

Add half a can of coconut milk and stir to combine the paste, then stir in the rest.

Add 2tbsp of the fish sauce and all the other ingredients. Add the roast pumpkin once it’s ready. Let it bubble away for 30 minutes until the potato is cooked. Don’t stir too much, and don’t worry if things start to disintegrate. Add some boiling water if it gets too thick.

Remove from heat, taste and adjust seasoning with the remaining fish sauce (salt), additional palm sugar (sweet) and lime (sour) as needed. Stir in Thai basil.  Serve on it’s own, or with jasmine rice.

Pad Thai
Standard

Pad Thai

I read a blog post about Pad Thai, and on my way back to my flat discovered an awesome Thai supermarket (the supermarket even had the exact same tamarind concentrate as David photographed).  Cool coincidence, so I bought (most of) the ingredients.  (Forgot peanuts, bother).

I find it easier to condense a recipe before cooking it so that I can remember it, so this is an adapted version of the blog post version which is itself adapted from The Better-Than-Takeout Thai Cookbook by Danette St. Onge.  It’s easier than I expected, and now I have most of the ingredients, I can see myself cooking it frequently.  Noodles keep for ages, and the prawns can sit in the freezer (I’ll probably end up skipping spring onions and bean sprouts and maybe tofu, and adding chilli and maybe shrimp paste).

Ingredients

  • 115g flat rice noodles
  • 2 tablespoons shallots, finely diced
  • 1 garlic clove, finely diced
  • 3 spring onions, green parts sliced 5cm, white bits finely sliced (they came in bunches of 8, so 8 went in)
  • 12 medium raw shrimp (mine were frozen)
  • 60ml fish sauce
  • 3 tablespoons granulated palm sugar (I used raw sugar, not sure if they are the same)
  • 2 tablespoons tamarind paste
  • 2 eggs
  • 75g bean sprouts
  • 80g pressed tofu (I drilled holes in the tofu carton sat it over a bowl and stacked heavy things on top – I had 4kg of tungsten lying around)
  • 50g roasted peanuts, coarsely chopped
  • fresh lime, for garnish

Method

1. Boil noodles 5 minutes, rinse in cold water.
2. Fry shallots, white bits of spring onions and garlic 5 minutes till fragrant add prawns for 5 minutes till cooked through(ish).
3. Add fish sauce, palm sugar, tamarind then noodles and leave a minute.
4. Push noodles to side and add eggs, once starting to set, add tofu, 2/3 of bean sprouts, tofu, spring onion and 2/3 peanuts. Add a little water if too dry.
5. Serve sprinkled with spring onion, peanuts, bean sprouts and wedges lime.

Standard

Less waffly Delia Smith hollandaise recipe

This recipe is great, but has a lot of text, and I’ve found myself summarising it before.  For future reference:

Ingredients

  • 2 large egg yolks
  • 1 dessertspoon lemon juice
  • 1 dessertspoon white wine vinegar
  • 110g block butter, softened
  • Salt and freshly ground black pepper

Method

  1. Egg yolks + seasoning in blender.
  2. Heat lemon juice and white wine vinegar to simmering, blend in.
  3. Heat butter to foaming, blend in in a trickle. Use a spatula to ensure everything is incorporated.

Word count ratio   ~ 6 : 1

Standard

Chicken Liver Pâté

Based on this Jamie Oliver recipe.  Although I tripled the quantity as I love pâté and it freezes well.  If something’s worth doing, it’s worth doing in large quantities.  From start to finish, I think this took me less than 30 minutes.  It’s one thing that takes me longer to eat than to cook.

First off, about 350g of the butter goes in a pan in the oven at about 100C to clarify.  The clear butter without the milky solids which float to the bottom is used to cover and seal the pâté in it’s pots.  It apparently takes around 10 minutes to separate out, but I forgot about it.  It was fine after about 20.

Butter in oven to clarify

Shallots get peeled (I hate peeling them) and diced – fairly finely, but it’s not too important – everything ends up in the blender.

Onions

Peeled onions

Chopped onions

Netherton Foundry 14 inch spun iron frying pan

I bought myself a huge (14 inch) oven safe spun iron frying pan from Netherton Foundry, which is awesome. This is the second thing I’ve used it for (the first being bacon and eggs, which is so much easier in a large pan).  It’s so big that it doesn’t fit in my oven…

Onions frying off

In goes the onion, at a medium heat to soften but not burn.

Bulb of garlic

Five cloves of garlic

Peeled garlic

Chopped garlic

Whilst the onion starts to cook, I chop the garlic.  I used 5 cloves, but they are huge, so maybe 8 normal ones.  I find slicing partially through both ends of the garlic from opposite sides gives me something to use to peel off the skin.  Then cutting length ways almost through to the end, but not quite, along two axes and then slicing across gets a really fine dice.

Cooked onion and garlic

Garlic goes in with the onion and cooks off until the onion is translucent and the garlic cooked but not browned.  Then remove the garlic and onion and wipe the pan out with some kitchen roll.

Cooked onion and garlic

Pan wiped clean

Livers frying

The livers go in to fry off with the sage.  They aren’t particularly photogenic.  They are meant to be cooked to have “some colour” but still be “pink in the middle”.  The recipe suggests a couple of minutes on each side.  Perhaps my pan wasn’t hot enough, but mine took longer.  I’m concerned I may have slightly overcooked them (as I was last time I made this).  Over cooking apparently leads to a grainy texture, and once I blend these, they do appear grainy, but the end produce is fine, and delicious.

Cooked livers

Calvados

Once the livers are cooked, a “small glass” of brandy goes in, or three in my case as I’m doing triple.  I used Calvados, and the measure was based on the amount left in the bottle.

Kenwood Chef and blender

I chuck everything (Liver including brandy, remaining butter, onion and garlic) in my blender in two batches to blend.  I find dicing the butter roughly first helps the process.  I poured it all into a bowl to mix before potting to ensure it’s consistent.  Then I poured it into some plastic containers which have clip on lids and are handy for the freezer.  Ramekins would be prettier, but I’m not intending to share.  Then I skim the butter to get rid of whatever is floating on the top and pour the clarified part over the pâté to seal it.  The milky looking butter solids in the bottom should stay where they are.  Last time I decanted it into a jug first, which made it easier.

Pâté in tub

Clarified butter

Pâté covered with butter

The pâté finished and sealed.  Now I have to wait for the butter to set before sticking them in the freezer.  And eating them.  Apparently it’ll last a couple of weeks in the fridge if the butter is left intact.  Last time I made it I was eating it so fast I was concerned I might overdose on vitamin A, I don’t think this is actually going to be an issue unless you ate several kilos per day.

Ingredients

1200g Chicken livers

750g Butter

5 large cloves garlic (or perhaps 8 normal ones)

some sage

100ml Brandy

8 Shallots

(pinch of mace to go in when blended, but I forgot)

Standard

Orange and ginger marmalade

Someone gave me some homemade marmalade, and I really like orange and ginger marmalade, so i decided to make some.  Mine turned out pretty good, could have set a bit more perhaps, but it tastes good.  It has a pleasant ginger spiciness to it. I based it on this recipe.  Ingredients at the end.

The first thing was to juice all the oranges – a bit of a pain – into a pan.  I have a lime squeezer which made life a little easier.  Then I removed all the pulp and saved for later.

Sliced peel

All the orange peel sliced.  i think I’ll go for slightly thinner next time, and remove a bit more of the white from the oranges.

Blitzed and strained pulp

I took all the pulp and stuck it in a blender with some water – the amount is not important, as I topped up the total to 4.5 litres later.

Blender

Blender for blending.

Straining pulp

I passed the pulp through two layers of muslin.  Again, a bit of a pain.  Most recipes say leave the pulp in some muslin and let everything sit overnight (to get as much pectin for setting the marmalade).  I was feeling impatient.

Pulp juice

The pulp strained.

Orange juice

The orange juice.

Ginger

Grated ginger

I used 300g of ginger and grated it.  Then I sliced it a little to make sure there weren’t any really big bits.  300g led to a slightly spicy end product, so I’d halve it if I wasn’t such a fan of ginger.

Boiling

Then I added orange juice and pulp juice to a pan and topped it up to 4.5 litres.  Peel and ginger go in too.

Checking temperature with thermometer

Handy temperature measuring device.  Makes life easier.

IMG_0926

IMG_0931

It has to boil for two hours to soften the peel.  I think mine almost halved in volume over that time.

IMG_0932

Boiling

Once the peel is soft (squeezes into two when squished between finger and thumb), take off the heat and dump in the 2kg of sugar.

Boiling

Stir until the sugar dissolves, and then leave it alone bubbling along on a high heat.

Boiling

There seems to be some debate around the correct temperature to get the marmalade to to get it to set.  Some places say 105C, some 104.5, and Delia apparently says 110C (I’d go for the 110 option, perhaps 109), but I can’t find the source.  You can also check by sticking it on a plate which has been cooled in the freezer, sticking it back in the freezer for a few minutes, and then running your finger through it to see if it wrinkles.

Test set

Test set - relative success

The latter is more successful – it didn’t flow back.

Boiling...

Cooling down again

Long story short, after several checks at different temperatures, I decided mine was okay having reached 108C.  This was after it boiled up in the pan, which I think is also a tell tale sign.  Mine is quite a soft set, so next time I’ll probably go for 110C.

Cool down temperature - 85C

Once the set point has been reached, leave it to cool.  I read 85C somewhere.  The aim is to have the peel evenly distributed in the jars.  Next time I’ll leave it to 75C.

Jam jars

I cleaned and steralised my jars, leaving them in the oven in a bain marie (tray of boiling water) at 150C until I was ready.  I warmed them first, as I thought they might shatter.

Finished and in jars

Then, in goes the marmalade and on go the lids.  Then I had to wash them all as I had marmalade everywhere.

Marmalade

Test jar

A pretty good set, but next time I’ll aim for firmer.

Marmalade on toast

Tasty marmalade on toast.  It’s already good, I’m hoping it gets better after sitting around for a while.  Apparently it should be stored somewhere cool and dark, and should last two years or so.

Breakfast

Breakfast.

The marmalade bubbling away.


Ingredients (made 8 jars):

4 Oranges (about 750g)

6 Clementines (about 750g)

2kg Granulated sugar

enough water to top up the total to 4.5 litres

Standard

Relatively lazy roast chicken

It’s Sunday, and I picked up a chicken whilst in the supermarket yesterday shopping for fruit to make a smoothie which I hope counteracts the effects of the previous evening’s beer.  I also decided to make marmalade for some reason, but that’s a different story.  I can’t be bothered to do anything complicated, so it’s roast chicken, roast potatoes, and leek and onions (healthyish?).

I was looking for cooking instructions, and failed to find the 20 minutes per 500g plus 20 minutes instructions, which it turns out were written on the chicken.  Most recipes on the internet seem to just say 1 hour 20, which isn’t particularly helpful unless you happen to buy the same sized chicken.  I then realised I had a thermometer and probe, which would surely be better, so I looked up the correct internal temperature.  The US FDA says 74C, but this site has far more interesting information.  It turns out to kill the bacteria you have to hold the temperature for a certain amount of time depending on how high it is.  Makes sense.  74C is instant annihilation, so seems a bit extreme.  The aforementioned site describes it as “the bacterial equivalent of shoving a stick of dynamite into an anthill”.  Here’s the data (metrified):

Temperature Time
58°C 68.4 minutes
60°C 27.5 minutes
63°C 9.2 minutes
66°C 2.8 minutes
68°C 47.7 seconds
71°C 14.8 seconds
74°C Instant

Chicken Cooking Times

74C seems daft, and probably means it’s guaranteed to be overcooked.  I’m not waiting an hour, or even half an hour, at 58C or 60C respectively, so 63C seems like a reasonable one to go for, and I’ll leave it in for 10 minutes once it gets there (the temperature will carry on rising, so this seems like a safe option).  This is my thermometer, it was £30 or so and includes Bluetooth connectivity, which is a complete waste of time.  It won’t connect to my phone when the distance is only about 6m from the oven to the couch.  It does have an alarm which goes off at a specified temperature though, which is great.

thermometer

So, I’m going to roast the chicken, I like the idea of a thyme oil, and lemon with herbs inserted from here, and I’ve got roasties, leek, onion, garlic I guess…  Full ingredient list at end of page.  I pre heated the oven to 190C.

Herbs

My herb garden is looking a little sorry, but provided some thyme, rosemary and a little sage (because it was there).

Ingredients

Crème fraîche, lemon onions, potatoes, herbs, leeks…

Herbs

Stuck some herbs and garlic in a pestle and mortar.  Bashed it a bit.

Butter herbs

Added some oil and butter.  Smashed it together.

Lemon herbs

Half cut a lemon and stuck some thyme and rosemary in it.

Chicken thermometer probes

Smothered the chicken in the butter.  Stuck the probes in the chicken.  Apparently between the thigh and breast is the best place, and this bore out.  The breast was up to temperature about 10 minutes earlier.  Added a couple of onions in quarters into the roasting tray along with a couple of cloves of garlic.  Lifting the chicken off the base of the tray is meant to help it cook better, so mine’s slightly elevated on the onion.  Sometimes I half an onion and balance it on the halves.  I think that’s Delia’s method.

Thermometer set to 63C

Set the alarm for 63C.  Stuck the chicken in the oven, and immediately turned the temperature down to 160C.

Potatoes

I like to par boil my roast potatoes.  until just less than cooked.  Before they fall apart when shaken to fluff up.

Leeks slit

I made leek and onion with Crème fraîche too.  Sliced the leeks down the length.

Leeks chopped

And then sliced across.

Onion chopped

Sliced the onions.

Butter in pan

Butter in the pan.

Onions in pan

Onions in the pan.  Sweated down with the lid on.

Onions softened

Leeks in pan

Then added the leeks and stuck the lid back on.  Added a little water to avoid it drying out.  Probably should have done this later, but it worked out tasty, if not aesthetically pleasing.

Lid on pan

Potatoes boiling

Potatoes par boiled.

Cast iron baking trays

I bought some small cast iron roasting trays.  The theory being that they would radiate the heat better and make good roast potatoes.  I stuck the trays in the oven to pre heat.

Potatoes fluffed ready for roasting

Drained the par boiled potatoes, left to stand for a minute or two, and then shook with the lid over the pan to fluff up the outsides.  Aiming to get them nice and crispy.

Potatoes and broccoli in cast iron roasting trays for roasting

Potatoes in the trays and some broccoli – I like roast broccoli.  I greased the trays with some rape seed oil.  Plenty of pepper over the potatoes, and spaced out to get heat around them.  Into the oven.

Chicken covered with foil

The breast hit 63C 10 minutes before the thigh, so the thigh is the best place to put the probe.

Once the thigh was at 63C I covered the chicken with foil and turned up the oven temp to 190C again to help the roast potatoes crisp up.

Chicken roasted

After 10 minutes, I pulled the chicken out, drained the juices into a pan and covered it with tin foil and a tea towel.  After testing this, I think I’d leave it for 20 minutes in total after hitting 63C next time.

Chicken covered with foil and tea towel

Onions and garlic from roasting chicken in pan with juices

Emptied the contents of the roasting tray into the pan with the chicken juices to make the gravy.

Some flour for the gravy

Added a tablespoon of flour in with the gravy ingredients to help thicken it.

Chicken wings into the gravy masher for smashing

Added the chicken wings from the bird for a bit of extra flavour and mashed everything up with a potato masher (Jamie Oliver technique).  This was over a medium heat.  The flour needs to cook out, and it’s nice to get a little colour on things.

Chicken stock frozen in ice cube tray

I had some chicken stock frozen in an ice cube tray from the last time I roasted a chicken.

Chicken stock ice cubes

One of the chicken stock ice cubes went into the gravy along with around 150ml boiling water.  Stirred it all up and incorporated the cooking adherents from the pan.

Cream into the leeks and onions

Heated up the leeky stuff and added some Crème fraîche, salt (quite a bit…) and pepper.

Stock and some boiling water into the gravy

Gravy after cooking for a bit - getting a better colour

After the gravy has bubbled away for a while, it gets a nicer hue (more gravy than grey).

Roast potatoes and broccoli

Took the roast potatoes out of the oven along with the broccoli.

Gravy straining paraphernalia

My gravy straining paraphernalia.  I carved the chicken and used the bones, etc. to make some more chicken stock.

Roast chicken with roast potatoes, roast broccoli and creamy leek and onions

Plated up roast chicken, broccoli, roast broccoli and creamy leek and onion.  Oh, and gravy.  Not the most beautiful presentation, but it tasted good.  Turned out to be more effort than I anticipated.

The chicken was cooked, but very slightly pink in places.  I think I’ll give it an extra 10 minutes next time.


Ingredients: 

1 Chicken

500g Potatoes

1 medium broccoli chopped into small fleurettes

2 leeks

4 onions

2 cloves garlic

150ml Crème fraîche

1 tablespoon plain flour

Chicken stock (cube, powder, frozen) to add to gravy

Salt, pepper

Standard

Wild Boar Tartiflette

Wandering through Borough Market, I was suckered in with free cheese and noticed some reblochon.  One thing led to another.

Ingredients

The only bacon I could find was wild boar, which is apparently “gamier”.  I mostly followed this recipe.  I boiled the potatoes (with a little vinegar which apparently stops them disintegrating).

Potatoes

Vinegar

PanPotatoes

Dice onion and slice bacon into largish lardons (1cm?).

OnionDiced

Fry up the onion and bacon for ages in some butter (I reckon I left them for about 40 minutes) to render down the bacon fat.

ButterMelting

BaconFrying

BaconAndOnions

Strain out off the fat for frying the potatoes, then throw in a couple of glasses of white wine, a little garlic and reduce until almost dry.

Garlic

BaconFryingWine

Once the potatoes are more or less cooked, fry them in the bacon fat, strained from the bacon and onions.  I added some goose fat, because, why not?  Heat the oven to 200C.PotatoesFrying

PotatoesFrying2

PotatoesFrying3

Add cream (200ml according to the recipe, one medium pot according to me) to the onion and bacon, season.

Cream

Some reblochon sliced ready for building the tartiflette.

Reblochon

Start with half the potatoes.

Build1

Then half the bacon onion creamy stuff

Build2

And half the cheese.

Build3

And repeat, potatoes, bacon, cheese.  Stick it in the oven for 15 minutes, until it’s all melted gooey and a little browned perhaps.

Build4

Cooked1

An incredibly efficient way of getting your daily/weekly calorie count.  And half a bottle of wine to finish off.

Cooked3

(Serves 6)
1.3kg waxy potatoes, skin left on
2 tbsp butter
1 onion, thinly sliced
200g smoked bacon lardons
150ml dry white wine
200ml whipping cream
1 reblochon
1 clove of garlic

What I went with (ish):

(Serves 2)
800g waxy potatoes, skin left on
50g butter
1 onion, thinly sliced
150g smoked bacon lardons
250ml dry white wine
250ml double cream
1/4 reblochon
1 clove of garlic, 2 tbsp vinegar, 1 tbsp goose fat


Standard

Pecan Pie

Makes one 8″ tart or 10 2.5″ tartlets.
Pâte sucrée
270g  Plain flour
150g  Unsalted butter at room temperature
50g   Icing sugar
1     pinch of salt
1     Whole egg
1tsp  Vanilla extract
Filling
150g  Caster sugar
150g  Butter
75ml  Double cream
50ml  Honey/Maple syrup
300g  pecans
pinch salt
Pecan Pie
Method
  • Pre-heat the oven to 175C.
  • Cream together the butter and icing sugar and then combine with the egg and vanilla.
  • Mix in flour and salt with spoon, knead briefly, just to bring the ingredients together in a ball.
  • Flatten to a small round, wrap in clingfilm and refrigerate for around 30 minutes.


  • Remove the pastry from the fridge, roll it to 3mm and line the tart tray.
  • Prick the pastry part way through with a fork and then line with baking parchment or foil and fill with beans.
  • Bake in the centre of the oven for 20 minutes, rotating halfway through.
  • Remove the pastry from the oven and empty the beans and paper/foil.  Brush the inside of the case with egg white and place it back in the oven for a further 5 minutes.


  • Place the sugar, butter, cream, honey and salt in a heavy pan, bring to a boil, stirring frequently.
  • Boil gently for 5-10 minutes, stirring occasionally, until it reaches the soft ball stage, 114C.
  • Remove from heat, leave to cool slightly and fold in the pecans.


  • Once the pastry is cooked, pour the filling into the tart case.
  • Bake for 10 minutes then remove and leave to cool before removing the pie from the tray.